1. Metal Framing
Metal wall framing is to be installed as per the requirements of BCA Volume 2.
The size of the steel stud should always be determined by an engineer to resist all applied loads in accordance with AS4600, AS1684 and AS1720.1 BCA.
Assume no axil strength contribution from Fire Wall Board.
2. Cavity Between Walls
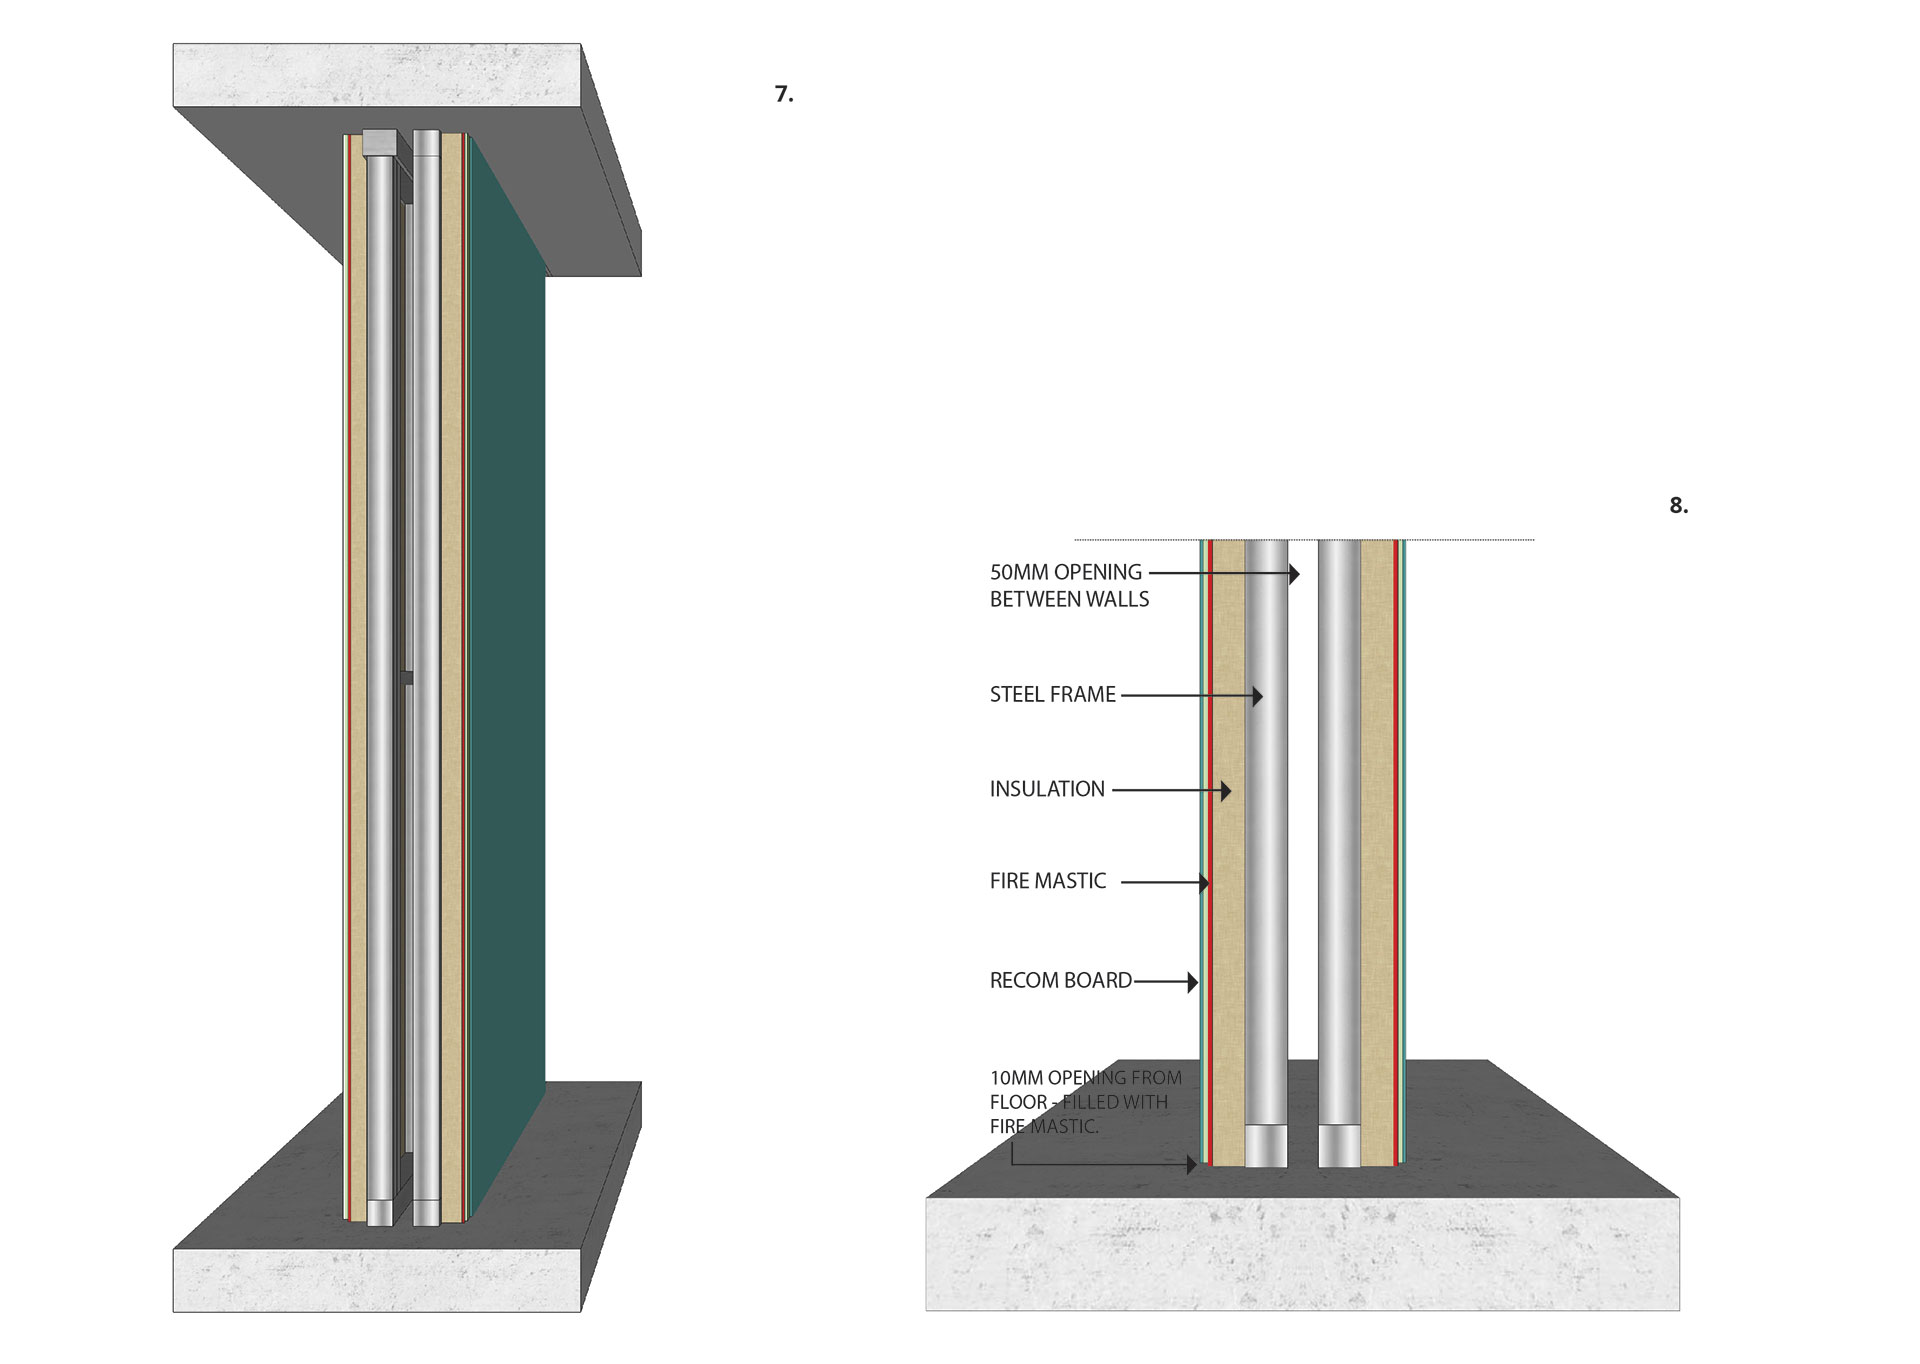
A cavity of 50 mm is required between both frames of the party wall.
3. Insulation
Knauf (or similar) Mineral Wool 27 kg / m3 Thermal & Acoustic Insulation Bats installed in both frames of the party walls.
4. Fire Proof Beading
Apply a 5mm bead of Boss Fire Mastic 300 Fire Rated & Acoustic Sealant along the entire frame.

5. Placing Fire Wall Board to Frame
Position the ResCom Fire Wall Board to the frame leaving a 10 mm gap between the floor and the bottom of the board and the ceiling and the top of the board.
6. Fixing Fire Wall Board to Frame
Screw Fix board to frame using Simpson Strong –Tie Non-Corrosive Class 5 / 8 Gauge / 32 mm self-drilling countersunk screws. Set Quick Drive System to ensure screws finish 0.5mm below the surface of the board. Screws fixed 15 mm from the edge of the board and at 250 mm centres
Back Blocking - Where the board does not land on wall studs, back blocking is required. Fix 100 mm wide strip of ResCom Fire Wall Board leaving an 8 mm gap between the face of the boards. 
 Run a 4 mm bead of Boss Fire Mastic 300 Sealant and screw fix.

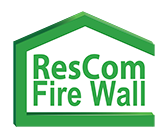
7. Fire Proof Beading in 10 mm Gaps
Fill the 10 mm gaps between the board & ceiling plus board & floor with Fire Mastic 300 Sealant.
8. Fill and Finish Screw Holes
All screw holes and joints should be finished with Knauf (or similar) Plaster Joining Compound as per the manufacturer’s instructions. The recessed edges on the Fire Wall boards allow for taping and clean joints.
9. Prime and Paint
Finish the wall with 1 coat of primer/sealer and then under coat and paint as per Dulux (or other) manufactures specifications.